
 Save
Save
Moose Farts are the kind of no-bake treat that instantly turn any kitchen into a place of laughter and shared stories. These little coconut chocolate morsels pack in all the joy of a childhood bake sale or a family potluck without ever turning on the oven. They are sweet chewy and just the right size for sneaking straight from the fridge. Whenever a holiday rolls around or I need a quick crowd-pleaser these are guaranteed to bring big smiles and a few giggles thanks to their unforgettable name.
The first time we made these my kids could not stop laughing at the name and each bite disappeared faster than I could roll them in crumbs. Now anytime we make a batch it feels like a family tradition.
Ingredients
- Sweetened condensed milk: brings that unmistakable creamy sweetness that holds everything together. Look for thick and glossy milk for best results
- Melted butter: adds richness and helps the mixture meld smoothly. Use real butter for that classic flavor
- Vanilla extract: gives a subtle warmth and depth. Choose pure vanilla if possible
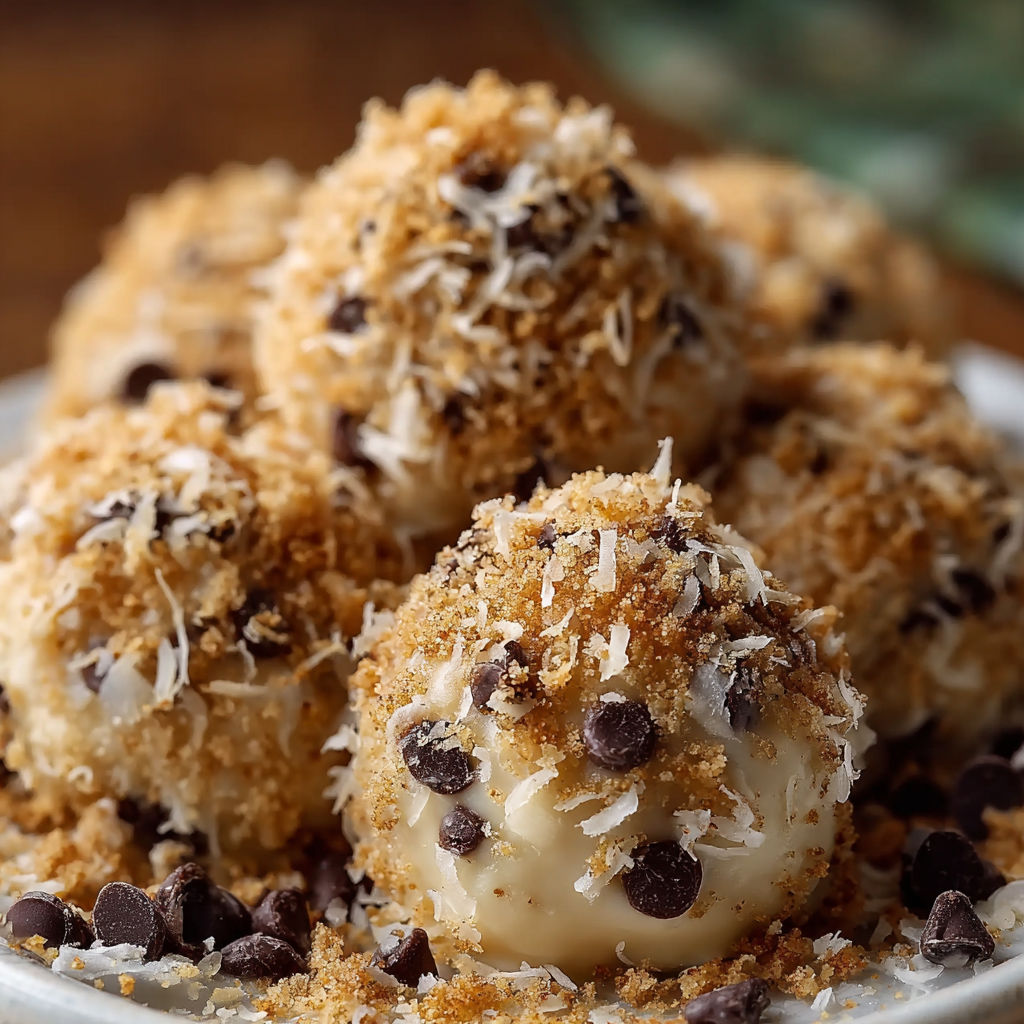
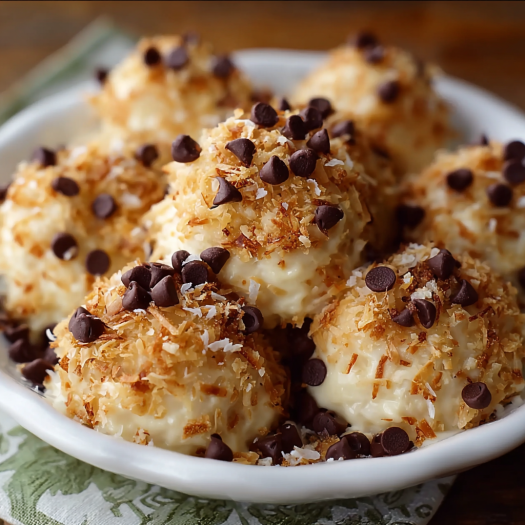
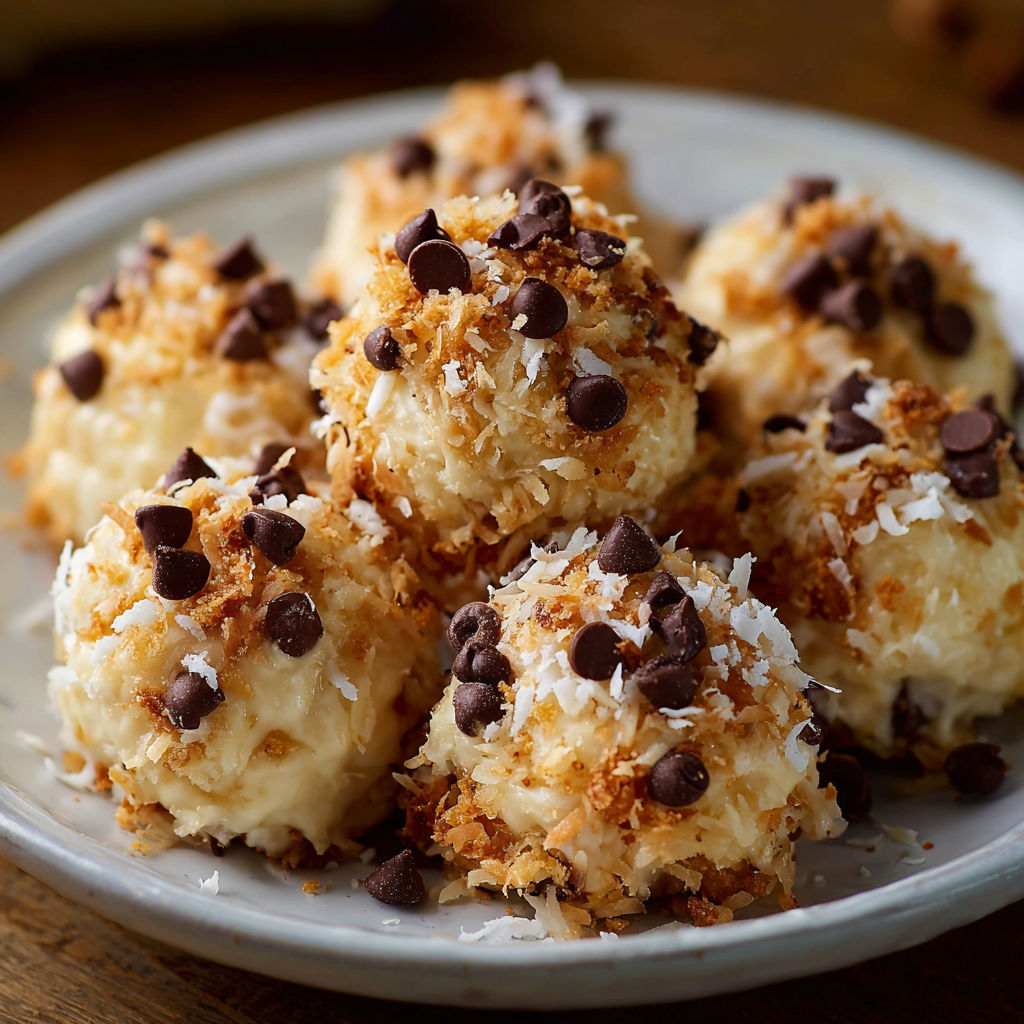
- Dried shredded coconut: gives chewy texture and tropical flavor. Unsweetened flakes keep things from being too sugary
- Graham cracker crumbs: provide structure and mellow out the sweetness. Crush your own for a fresher taste and extra crumbs make a lovely outer coating
- Chocolate chips: create pockets of chocolate in every bite. I lean on semi-sweet for balance but any favorite chip works
Instructions
- Mix the Wet Ingredients:
- In a large mixing bowl stir together the melted butter sweetened condensed milk and vanilla extract until everything is completely blended and glossy. This step ensures your sweet base is ready for mix-ins.
- Combine the Dry Ingredients:
- Add the graham crumbs shredded coconut and chocolate chips directly to your wet mixture. Use a sturdy spoon or spatula to fold until every bit is coated and the mixture looks uniform. Take care to get deep into the bowl — hidden dry patches will affect texture.
- Chill the Mixture:
- Cover the bowl tightly and slide it into the refrigerator for at least one hour. This downtime lets the crumbs and coconut hydrate and makes the mixture far easier to shape.
- Shape the Balls:
- Using a small cookie scoop or your hands take tablespoon-sized portions and gently roll into compact balls about one and a quarter inches in diameter. Keep the balls small — these are undeniably rich.
- Coat with Graham Crumbs:
- Pour a shallow pile of graham crumbs onto a plate. Roll each ball to coat all sides well. This final coating adds a soft crunch and keeps the balls from sticking together.
- Final Chill:
- Arrange the finished balls on a parchment-lined sheet and pop them back into the fridge for another half hour until perfectly firm. They are best enjoyed cold for maximum chew.
Coconut is my forever favorite in sweet treats. One year my niece requested a moose fart cake for her birthday just because she wanted these scattered on top. They steal the spotlight in the most charming way.
Storage Tips
Pop finished balls into an airtight container and layer with parchment to prevent sticking. They thrive in the fridge for up to a week and freeze beautifully for longer. When frozen let them thaw for 10 minutes for best chewy texture. Perfect for stashing ahead of the holidays or whenever you want a sweet bite on hand.
Ingredient Substitutions
Swap the graham crumbs for crushed digestive biscuits or vanilla wafers if you prefer a different flavor in the base. Dark chocolate chips are excellent for less sweetness. Gluten free graham crackers will make these suitable for those with sensitivities. And if coconut is not your thing you can use finely chopped nuts instead but expect a firmer texture.
Serving Suggestions
Pile on a platter as a cute dessert buffet option or tuck a few into mini paper cups for lunchbox treats. For parties these look charming arranged on a rustic wooden board or stuffed into mason jars for edible gifts that always get a chuckle. Try adding a sprinkle of sea salt on top for a little grown-up flair.
Cultural and Seasonal Context
This Canadian classic earned its giggle-worthy name thanks to its fun shape and easy assembly. They are a fixture at family gatherings holiday trays and paddling trips across the provinces. In summer cool Moose Farts are refreshing after a barbeque and in winter they’re a holiday staple tucked among cookies and bars.
Seasonal Adaptations
Roll in toasted coconut for spring gatherings. Add a pinch of cinnamon in fall for a cozy twist. Decorate each one with a colored candy in the center for festive occasions.
Success Stories
These little bites have sparked kitchen camaraderie in my home more times than I can count. Friends who have never cooked before always say Moose Farts are their first and favorite kitchen victory. They are simple but truly special.
Freezer Meal Conversion
Arrange balls in a single layer on a tray and freeze until firm. Then drop them into a zip-top bag and stash them until needed. You can make double or triple batches for bake sales or parties no extra effort required.
When you need something quick with maximum payoff Moose Farts are a joy to make and even more fun to share. The combination of coconut chocolate and creamy condensed milk almost guarantees they will be the first to disappear each time.
Common Recipe Questions
- → What texture should I expect from Moose Farts?
Expect a soft, creamy center with slight chew from coconut and a light crunch from graham crumb coating.
- → Can I substitute the chocolate chips?
Yes, white or butterscotch chips can be used for a different flavor twist in these sweet bites.
- → How long can I store them in the fridge?
These bites keep well in the refrigerator for up to one week in an airtight container.
- → Do I need to bake Moose Farts?
No baking is required; simply mix, chill, roll, and enjoy these no-bake confections cold.
- → What's the best way to serve these treats?
Serve chilled for a firmer texture and the most satisfying flavor. They're great for sharing or snacking.