
 Save
Save
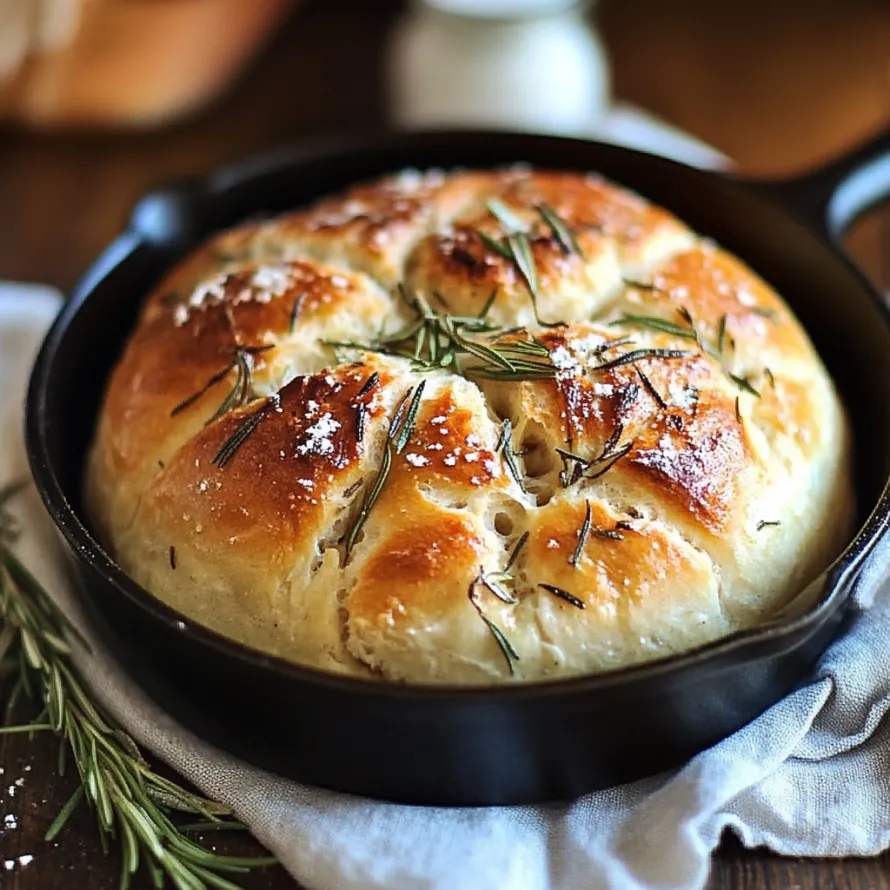
This homemade skillet bread bursting with garlic and rosemary turns basic pantry items into a showstopping loaf right on your stovetop. The mix of aromatic herbs and pungent garlic fills your home with mouth-watering smells before you've even taken that first bite.
I whipped this bread up the first time when friends dropped by with barely two hours' notice. Their faces when they bit into those warm slices told me everything - this one had to become a staple in my kitchen.
Ingredients
- All purpose flour: Gives you that goldilocks texture that's neither too heavy nor too light
- Instant yeast: Makes the process quicker since you don't need to activate it separately
- Salt: Boosts flavor profiles and helps manage yeast behavior
- Sugar: Feeds the yeast so your bread puffs up nicely
- Olive oil: Brings moisture and helps form that gorgeous outer crust
- Warm water: Wakes up the yeast - should feel like comfortable bathwater
- Fresh garlic cloves: Deliver way more punch than the jarred or powdered stuff
- Fresh rosemary: Adds that wonderful forest-like scent - if using dried, just put in half as much
- Coarse sea salt: Sprinkled on top for little bursts of flavor in each bite
Step-by-Step Instructions
- Combine Dry Ingredients:
- Throw the flour, yeast, salt and sugar into a big bowl and stir them together well. This spreads out the yeast and salt so they don't clump up - keeping the salt from directly touching the yeast stops it from killing your rise.
- Create The Dough:
- Add your olive oil and warm water, then stir with a wooden spoon until everything sticks together. Don't worry if it looks a bit rough and uneven - that's totally fine. Just keep mixing until you can't see any dry flour anymore.
- Add Aromatics:
- Mix in your chopped garlic and rosemary by folding them through the dough, working it gently to spread the flavors around. This way, you'll taste those amazing flavors in every mouthful. Knead for about 5 minutes until you get a smooth, bouncy dough that springs back when you poke it.
- First Rise:
- Put a clean kitchen towel or some plastic wrap over the bowl and stick it somewhere cozy and draft-free. Let it puff up for about an hour until it's twice as big. During winter, try putting it near a warm oven or in a sunny spot.
- Preheat And Prepare:
- Stick your cast iron pan in the oven and turn it up to 400°F. Getting the pan hot first helps make that amazing bakery-style crust we all want. Give it at least 10 minutes to get properly hot.
- Shape The Loaf:
- Gently push down on the puffy dough to release air and roll it into a nice round shape. You don't need to work it hard - just coax it into a ball with your hands.
- Transfer To Skillet:
- Pull out the hot skillet from the oven using thick pot holders. Quickly coat it with a bit of oil, then pop your ball of dough right in the middle. Work fast but carefully so you don't burn your fingers.
- Final Touches:
- Drizzle plenty of olive oil over the top of your dough to help it turn all golden and crispy. Scatter coarse sea salt across the surface to make it look pretty and taste even better.
There's something special about pulling this bread from the oven in my home. We always tear into the first piece while it's still too hot to handle properly, but somehow that makes it taste so much better. I've noticed using really good olive oil actually changes both how it tastes and feels in your mouth.
Make Ahead Options
You can get the dough ready up to a day ahead and keep it in your fridge. The slow, cold rising actually makes it taste even better than the quick version. Just take it out about half an hour before baking so it can warm up, then follow the normal baking steps.
Perfect Pairings
This bread really stands out next to thick soups and stews, especially ones with tomato bases where you can mop up all that tasty liquid. For a quick but fancy starter, serve warm chunks with some good olive oil and balsamic for dipping. It also makes your grilled cheese or Italian sandwiches taste like they came from a fancy café.
Flavor Variations
Garlic and rosemary work amazingly together, but you can switch things up easily. Try mixing in sundried tomatoes with basil for an Italian feel, or swap the rosemary for thyme and throw in some parmesan for French flair. Want something more filling? Chuck in some chopped olives and crumbled feta cheese.
Keep some extra olive oil and fresh herbs on the side to really jazz up this bread when you serve it!
Common Recipe Questions
- → Can I swap fresh rosemary with dried?
You sure can! Just use 2 teaspoons of dried rosemary since it's more concentrated. Give it a quick crush before adding to release extra aroma and flavor.
- → What can I do if I don’t own a cast-iron pan?
No worries! Use any oven-safe dish or even a regular tray. The crust may not be as crispy, but it still works. Just place the shaped dough on parchment before baking.
- → When is the bread ready to come out of the oven?
It’ll be golden on top and sound hollow if you tap the underside. Or, for accuracy, use a thermometer to check—it should hit between 190-200°F (88-93°C).
- → Can other extras like herbs or cheese go in the dough?
Definitely! Toss in ingredients like parmesan, olives, sun-dried tomatoes, or thyme. Just avoid overloading with wet stuff—it might mess with the dough’s texture.
- → What’s the best way to store leftovers?
Once fully cooled, keep it in a paper bag or bread box at room temp for 2-3 days. To keep it longer, slice and freeze in an airtight container for up to 3 months. Pop slices in the toaster when ready to enjoy.
- → Can I let the dough sit overnight?
Yep! After kneading, refrigerate up to 24 hours—it deepens the flavor. Just let it sit out for 30 minutes to come to room temp before shaping and baking.