
 Save
Save
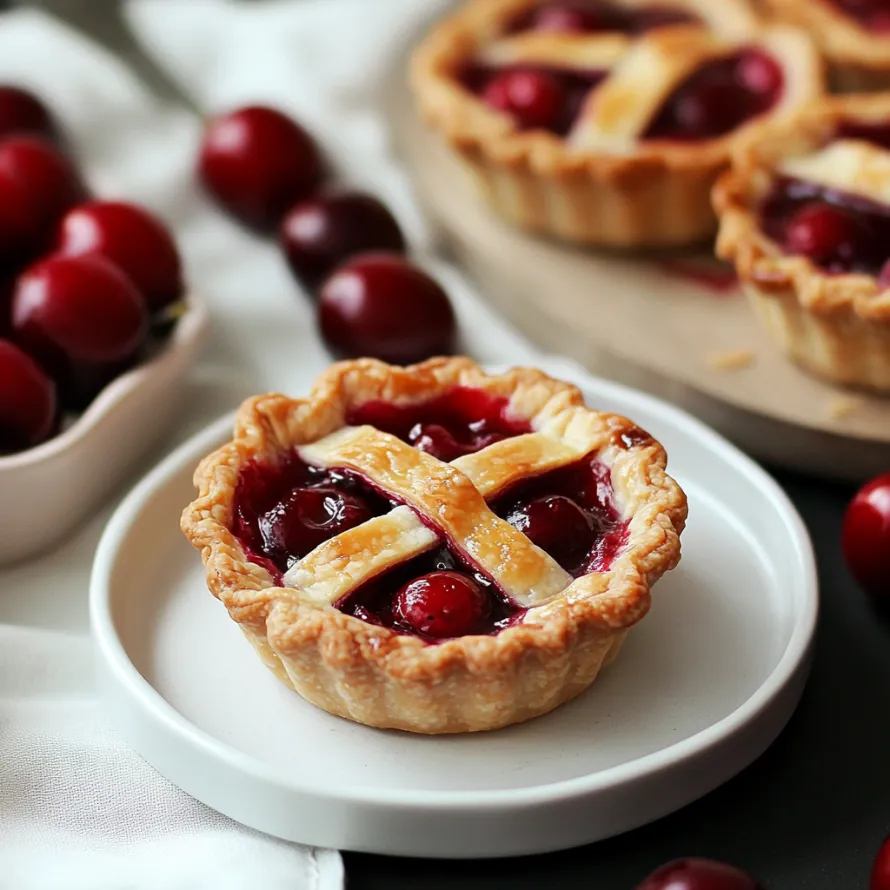
These tiny cherry tarts turn juicy summer cherries into cute handheld delights with crisp crusts and thick, fruity centers. The mix of sweetness and tanginess makes these personal-sized pies impossible to resist whether you're hosting friends or just craving something sweet.
I created these mini cherry tarts for our big family get-together when I needed something both easy to carry and nice to look at. When my relatives spotted the woven tops, they thought I'd been slaving away forever, but these little gems come together surprisingly fast.
Ingredients
- Fresh cherries: Give you that perfect sweet-tart combo, go for dark sweet varieties for the tastiest results
- Cornstarch: Makes the filling set up nicely so you won't have drippy pies and each bite stays together
- Almond extract: Brings out more cherry flavor but you can skip it if anyone can't have nuts
- Coarse sugar: Creates that fancy bakery look and adds a nice crunch on top
- Dark colored muffin pan: Gets you crunchier, more golden crusts compared to light metal ones
Step-by-Step Instructions
- Prepare cherry filling:
- Mix cut cherries with sugar, cornstarch, salt, lemon juice, and extracts in a bowl. The sugar pulls juice from the cherries through soaking, creating that perfect jam-like texture after sitting for 10 minutes.
- Roll out pie crusts:
- Spread first cold pie crust on slightly floured counter to 11-12 inches across, turning dough every so often to keep it from sticking. Always roll from middle outward for best results. Cut out 8 or 9 rounds using a 4-inch circle cutter for your muffin cups.
- Form mini pie shells:
- Push each round gently into muffin cups, using one hand to guide sides down while pressing middle with fingertips. This stops tearing, but any small rips can be fixed with leftover dough.
- Fill the pies:
- Spoon one tablespoon of cherries into each shell, then pour the collected cherry juice evenly between all pies (about one tablespoon per pie). Splitting up the filling this way makes sure everything's spread out right.
- Create lattice tops:
- Slice remaining dough into thin quarter-inch strips. Lay half going up and down, then fold every other strip back. Put a strip going sideways, then fold strips back over, making that classic woven pattern. Cut finished lattice into 2.5-inch circles and place on top of filled pies.
- Finish and bake:
- Brush woven tops with beaten egg and sprinkle with chunky sugar for shine and extra crunch. Bake at 375°F for 22-25 minutes until golden and the filling bubbles.
- Cool properly:
- Let pies sit 5 minutes in the pan, then carefully take out and put on a wire rack to finish cooling, which keeps bottoms from getting mushy from trapped steam.
The almond extract is my hidden trick in this dish. My grandma always added it to anything with cherries, saying it makes cherry flavor pop more. Once I tried making these without it, and everyone noticed right away — they all asked what I'd left out.
Make Ahead Options
These tiny cherry tarts keep really well, so you can plan ahead. After they've cooled down completely, pop them in a sealed container and they'll stay good on your counter for up to 2 days. Want to keep them longer? Stick them in the fridge for up to 5 days, though the crust might not stay as crisp. To fix that, just warm them in a 300°F oven for 5 minutes before you serve them.
Fruit Variations
Cherries work great in this recipe, but you can try other fruits too. If you use blueberries, you won't need as much cornstarch since they don't get as juicy. For apples, chop them up and cook them on the stove for about 5 minutes first to soften them. Mixed berries look amazing with their bright colors, but you'll want to bump up the cornstarch to 3 tablespoons because they're extra juicy.
Serving Suggestions
These mini tarts taste wonderful by themselves, but you can dress them up even more. Try adding a small scoop of vanilla ice cream for that hot-cold magic when you eat them. A dollop of lightly sweetened whipped cream with a touch of almond extract goes really well with the cherry taste. For fancy dinner parties, dust your plates with powdered sugar and add a little fresh mint leaf.
These mini tarts aren't just tasty but they're also a fun way to enjoy cherry season with family and friends. They're easy to carry around and so cute that everyone will want one whenever you bring them!
Common Recipe Questions
- → Can I use frozen cherries for these mini pies?
Sure thing, frozen cherries work great! Just make sure to thaw them fully and pour off extra juice before mixing with sugar and cornstarch. You might need to bake them a minute or two longer.
- → How do I store leftover mini cherry pies?
Keep cooled pies in a sealed container at room temp for up to 2 days, or in the fridge for up to 5 days. Pop them in a 300°F oven for 5-10 minutes to make them crispy again.
- → Can I make these without the lattice top?
Of course! You can go with a full top crust with small cuts for steam to escape, or try a crumbly topping made from butter, flour, and sugar for something different.
- → What's the best way to pit cherries?
A cherry pitter works wonders, but you can also try a bent paperclip, a small pastry tip, or even poke the pit through with a chopstick from the stem end.
- → Can I make these mini cherry pies ahead of time?
Definitely! You can get the filling and dough ready up to 2 days early and keep them separate in the fridge. Or just bake the whole pies, let them cool completely, and freeze them in an airtight container for up to 3 months.