
 Save
Save
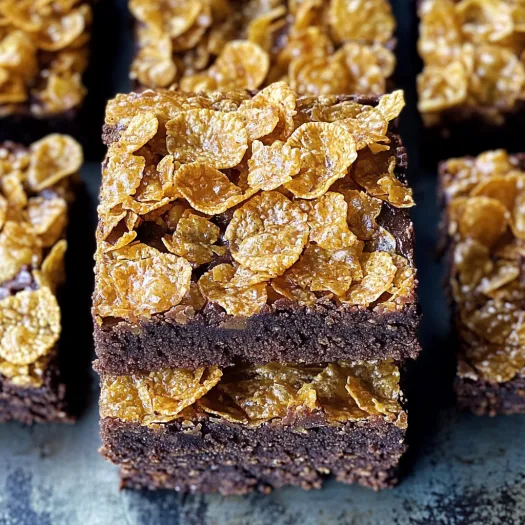
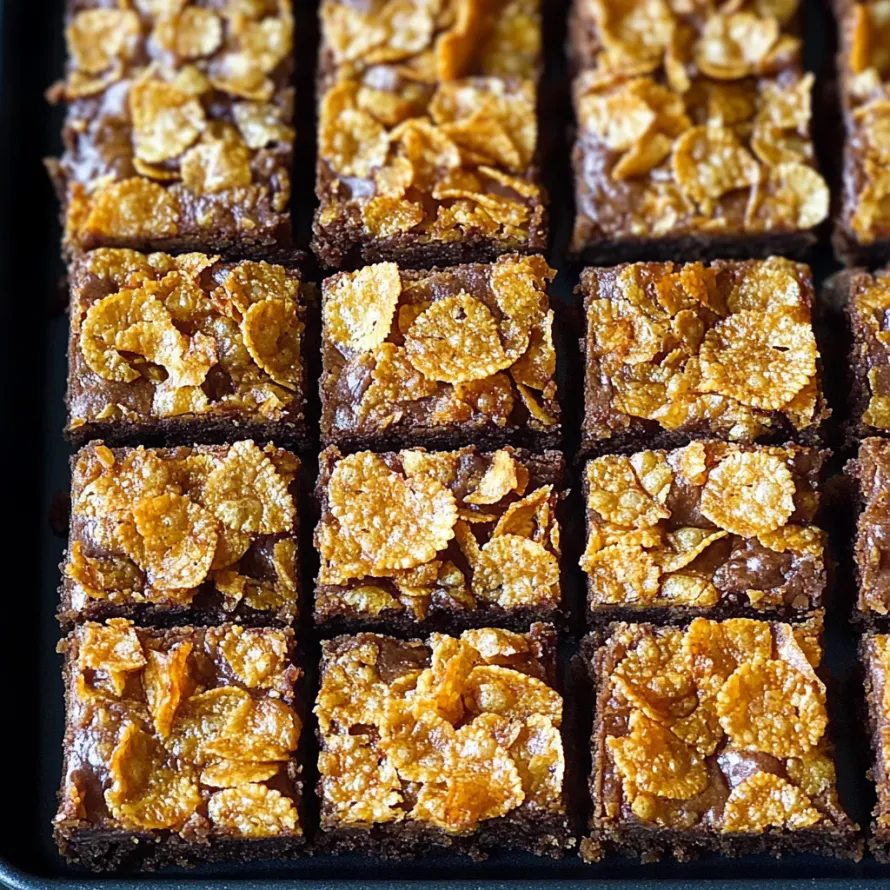
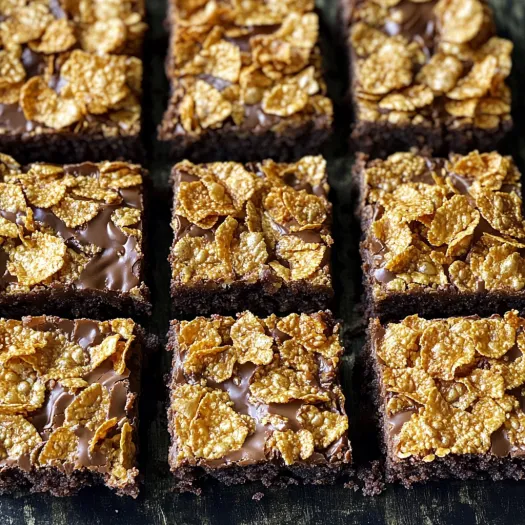
These luxurious cornflake brownies mix rich, fudgy chocolate base with a snappy, sweet cornflake crown for a treat that's impossible to resist. The candy-like top layer creates an amazing textural contrast that'll make these treats stick in your memory forever.
I whipped these up for my kid's school fundraiser and they vanished quicker than everything else. These days they're demanded at every family party and my container always ends up empty when I head home.
Ingredients
- Unsalted butter: Adds depth and helps make those brownies extra fudgy. Go with unsalted to keep control of how much salt goes in.
- Dark chocolate: Makes up the core taste of your brownies. Pick something good with 60% cocoa or more for the tastiest outcome.
- Brown sugar: Brings dampness and hints of caramel that work well with chocolate.
- Granulated sugar: Builds framework and adds sweetness throughout both sections.
- Plain flour: Gives your brownies body while keeping them thick and gooey. Watch your measurements for best outcomes.
- Cocoa powder: Boosts the chocolate punch. Dutch processed works great for deeper color and smoother flavor.
- Double cream: Makes the caramel just right. Warming it a bit stops the caramel from getting grainy.
- Cornflakes: Give that famous crunch. New boxes work better since older ones might turn mushy.
Step-by-Step Instructions
- Prepare Your Equipment:
- Warm your oven to 180C/350F and get your baking tin ready by coating it well with butter and adding parchment paper. This helps you take out the brownies easily later. A 9x12 inch tin will make them just the right thickness.
- Create The Chocolate Base:
- Mix butter and dark chocolate together in a pot with medium heat or try quick blasts in the microwave for 30 seconds at a time. Keep stirring until it's all smooth, then let it sit and cool down a bit. Don't skip cooling or you'll accidentally cook your eggs too soon.
- Whip The Eggs And Sugar:
- Take a big bowl and throw in eggs with both sugars. Beat them hard until they look lighter and grow almost twice as big. This puts air in for great brownie feel. An electric mixer makes this super easy, but a hand whisk can do the job with extra muscle.
- Combine Wet And Dry Ingredients:
- Dump your cooled chocolate mix into the egg mix and stir until they're totally combined. Next add flour, cocoa powder and salt, mixing just enough to make a smooth batter. Too much mixing now can make your brownies tough.
- Bake The Brownie Base:
- Put your batter in the tin and spread it flat with a spatula. Bake for 35-40 minutes, checking by poking it with a toothpick - a little wetness means they'll be nice and fudgy. Let them cool in the tin for 10 minutes before moving to the next part.
- Create The Caramel:
- Working bit by bit, melt sugar for your topping in a tall pot over medium heat. Add a quarter at a time, keep stirring until each part melts before adding more. Keep going until all sugar turns into a deep amber liquid. This slow way stops sugar from getting grainy.
- Finish The Caramel:
- Take it off the heat and quickly put in butter in two parts, mixing until it's smooth. Slowly pour in the warm cream while constantly stirring. Put it back on medium heat for about 2 minutes so it thickens up a bit. Using warm cream keeps the caramel from turning hard and chunky.
- Add Cornflakes And Assemble:
- Take the caramel off heat and mix in salt then cornflakes, making sure they get totally covered. Pour this mix over your somewhat cooled brownie bottom, spreading it out evenly. The brownies should be slightly warm but not hot when you add the topping.
- Chill And Serve:
- Put in the fridge at least 2 hours or better yet, overnight so everything sets up nicely. Once firm, lift out using the paper edges, cut into squares and enjoy. Wipe your knife between cuts for prettier pieces.
That caramel cornflake crown really sets these brownies apart. I stumbled on this trick years back while trying to use up some cereal, and the combo was so incredible it instantly became a family favorite. The way the caramel sets just enough while staying a bit chewy makes a texture that goes perfectly with the gooey brownie foundation.
Storage Tips
These treats stay fresh in a sealed container in the fridge for up to 5 days. The cornflake top actually gets better after sitting for a day as everything mingles together. I suggest putting wax paper between layers if you stack them to keep them from sticking. You can freeze these goodies for up to 3 months too. Just wrap single pieces in plastic wrap then foil before putting them in the freezer. Let them thaw in the fridge overnight before you eat them.
Troubleshooting The Caramel
Caramel can seem scary to make, but adding sugar bit by bit like we do here makes it way easier. If your caramel gets grainy, just add a spoon of water and keep heating while you stir. For a darker, slightly bitter caramel, let the sugar cook a bit longer until it turns deeper brown. If your caramel seems too thick after mixing in cornflakes, you can add an extra spoon of warm cream to thin it out before you spread it over the brownies.
Serving Suggestions
These brownies will wow everyone when you serve them with a blob of vanilla ice cream and some extra caramel drizzled on top. For fancy dinner parties, cut them small and arrange them on a plate with fresh berries. They taste great with coffee, especially strong espresso that goes well with the deep chocolate and sweet caramel flavors. Try warming them slightly before eating to make the brownie part even more gooey.
These brownies hit all the marks - gooey, crunchy, and super chocolatey—perfect for any time you want to make folks go wow!
Common Recipe Questions
- → Can I use milk chocolate instead of dark chocolate for the brownie layer?
Sure, milk chocolate works fine, but your treats will end up sweeter with a milder chocolate taste. If you go with milk chocolate, try cutting back the sugar by about 50g to keep it from getting too sweet.
- → How do I know when the brownies are properly baked?
They're done when you stick a toothpick in the middle and it comes out with a few damp crumbs stuck to it but no wet batter. Don't leave them in too long or they'll turn dry instead of gooey. The sides should be firm while the middle stays a bit soft.
- → Can I make the caramel cornflake topping in advance?
You really need to make the sweet cornflake mix right when you're ready to use it. The sweet coating starts hardening quickly, and you want to spread it while it's still warm and flexible. If it gets too hard, you'll struggle to cover the brownie part evenly.
- → How should I store these brownies?
Keep them in a sealed container in your fridge for up to 5 days. The cold helps keep the contrast between the gooey bottom and crunchy top. Let them sit out for 10-15 minutes before eating so you get the best texture.
- → Why is my caramel crystallizing while cooking?
This usually happens when sugar starts forming crystals while you're cooking. To stop this, add your sugar bit by bit as the recipe says and stir gently but don't stop. Don't scrape the sides of the pot since crystals often start forming there. A tiny bit of lemon juice or corn syrup can also stop crystals from forming.
- → Can I freeze these brownies?
Yes, they freeze pretty well. Cut them into pieces, wrap each one in plastic wrap, then put them in a freezer container for up to 3 months. Thaw them in your fridge overnight before eating. The cornflake top might not be quite as crunchy after freezing but will still taste great.