
 Save
Save
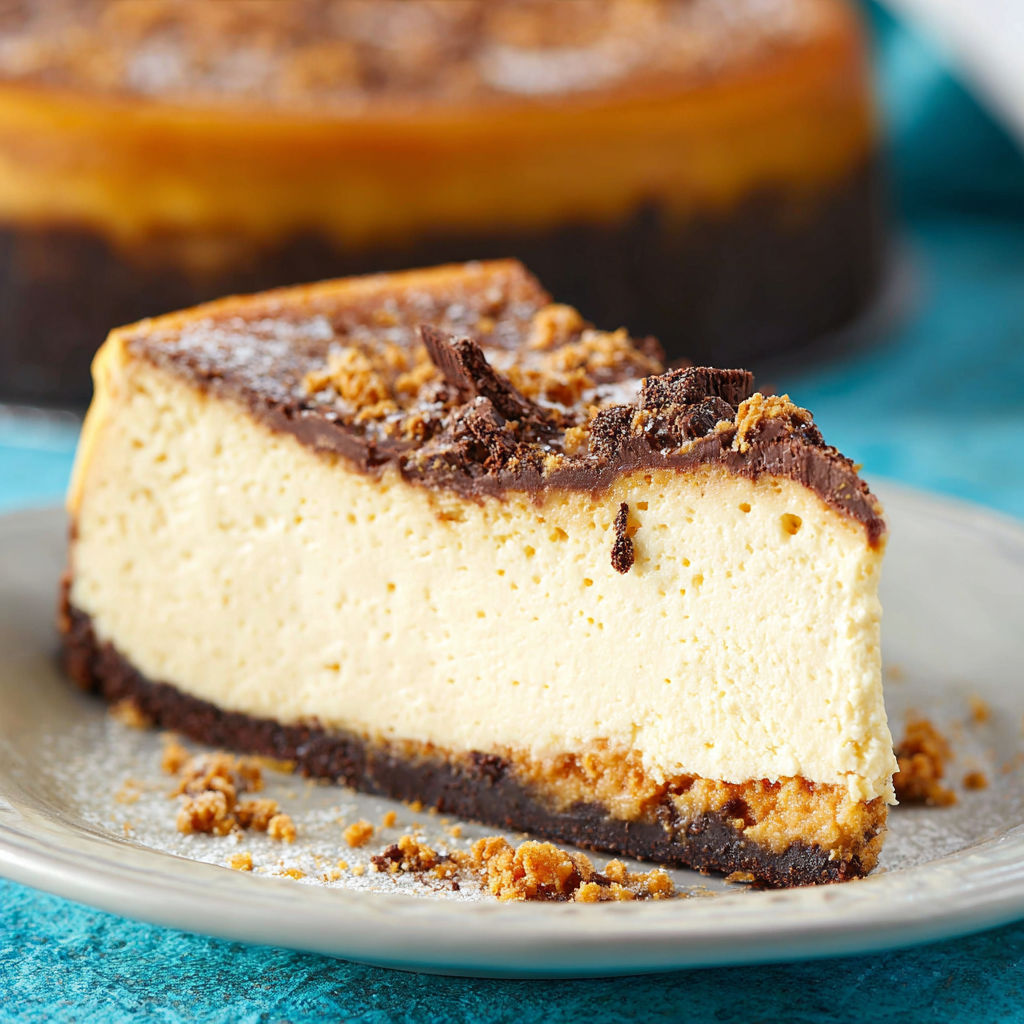
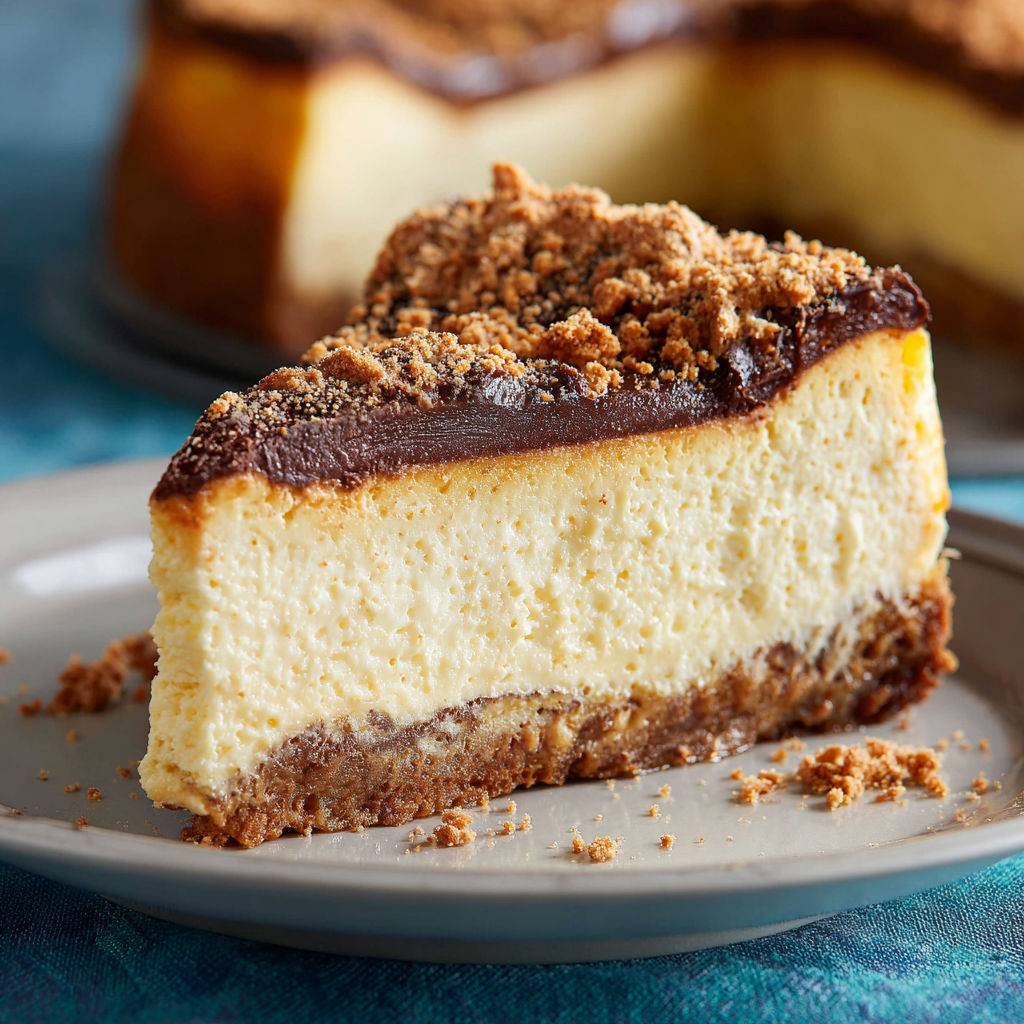
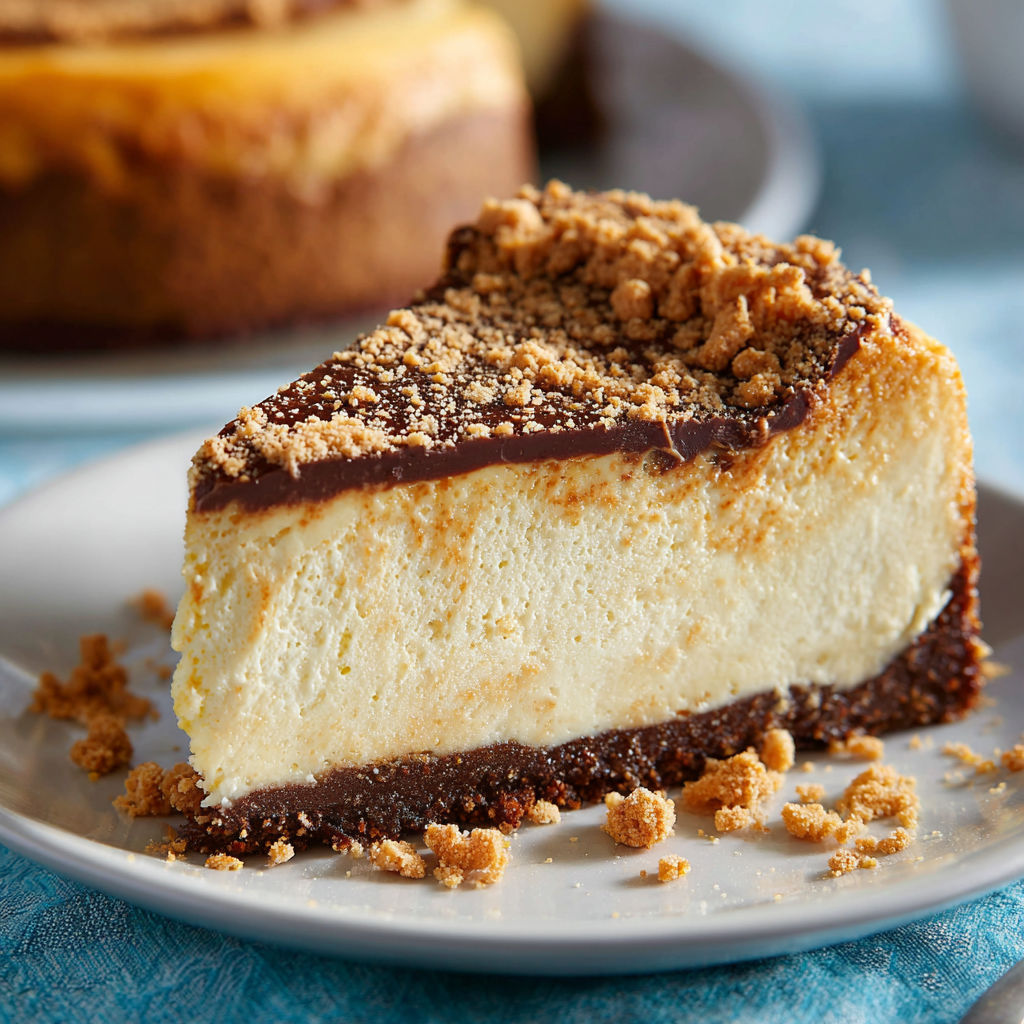
Nothing satisfies a craving for something rich creamy and over the top quite like a Butterfinger cheesecake This is the dessert I make when birthdays or gatherings call for a little show stopping sweetness Each bite gets that dreamy mix of chocolate peanut butter and tangy cheesecake on a crunchy cookie crust It is a full celebration in every slice
When I first brought this to a family reunion I remember my brother declaring it “the best thing you have ever baked” Since then it joins every major holiday menu and my kids light up every time I set it on the table
Ingredients
- Oreo crumbs for the crust: Use regular Oreo cookies Remove the cream filling before crushing for the best texture and strong chocolate flavor
- Salted butter: Binds crumbs for a crust that holds together opt for good quality real butter
- Cream cheese: Full fat at room temperature for a smoother filling and classic tang Only use the bricks not the spread
- Granulated sugar: Provides sweetness and balances tang
- All purpose flour: A touch helps thicken the cheesecake and contribute to structure
- Sour cream: For creaminess and a subtle tang be sure it is room temperature
- Peanut butter: Smooth commercial peanut butter keeps the filling velvety and rich Choose fresh and never separated
- Vanilla extract: Brings warmth and depth Use pure vanilla if possible
- Large eggs: Give structure and set the creamy filling room temp for even mixing
- Fun sized Butterfinger bars: Chopped for folding in and decorating Go for fresh bars with plenty of crispness
- Semi sweet chocolate chips: For ganache topping Pick chocolate you would eat on its own
- Heavy whipping cream: Lends richness to ganache and stability for homemade whipped cream
- Powdered sugar: For lightly sweetening the whipped cream
- Parchment paper: For easy release from the pan choose unbleached for best flavor
Instructions
- Prepare the pan:
- Line the bottom of a nine inch springform pan with parchment and grease the sides for easy release It makes all the difference later
- Make the crust:
- Stir Oreo crumbs and melted butter in a small bowl until fully moistened Press into the prepared pan forming a compact base Bake for ten minutes at three hundred twenty five degrees Fahrenheit then set aside to cool
- Wrap the pan:
- To protect the crust from moisture cover the sides and bottom of your pan with aluminum foil Double wrap for added peace of mind
- Mix the cheesecake base:
- Beat cream cheese sugar and flour together on low until smooth and creamy It is important to blend gently Scrape down the bowl frequently for an even batter
- Add sour cream peanut butter and vanilla:
- Start the mixer again on low Fold these in until fully combined to avoid overmixing
- Add eggs one by one:
- Incorporate each egg gently Allow them to be fully absorbed into the batter before adding the next This step helps prevent overmixing which can cause cracks
- Fold in chopped Butterfingers and assemble:
- Carefully stir in your candy pieces Pour the batter gently into the prepared crust and spread smooth
- Prepare the water bath:
- Set your cheesecake pan in a larger roasting pan Pour hot water in the outside pan until it comes halfway up the springform pan This insulates the cheesecake for perfect creamy texture
- Bake and cool:
- Bake at three hundred degrees for about one hour and twenty five minutes The center should jiggle slightly Turn off the oven and let rest inside thirty minutes before cracking the door for thirty more minutes to finish cooling
- Chill to set:
- Move the cheesecake to your fridge wrapped and chill until fully firm at least five hours or overnight The chill time is key for slices that hold together
- Decorate once cold:
- Make chocolate ganache by pouring hot cream over chocolate chips Wait two minutes then whisk smooth Spread atop cheesecake
- Whip the cream:
- Beat heavy cream powdered sugar peanut butter and vanilla on high until firm peaks spoon into a piping bag and pipe rounds around the edge
- Finish with Butterfinger bits:
- Chop and sprinkle over top These candy shards add both flavor and a delightful crunch
- Keep refrigerated:
- Keep refrigerated until ready to serve Best within three to four days
I always look forward to folding in those chunks of Butterfinger It is a tiny step that guarantees a surprise crunch in every single bite My youngest always steals the extra bits and it has become a sweet little tradition to let them help with this part
Keeping Your Cheesecake Fresh
Cover your cheesecake tightly with plastic wrap or transfer slices to airtight containers When stored properly this cheesecake tastes freshly made for up to four days in your fridge If you want to freeze it consider wrapping it first in plastic and then foil to protect against freezer burn This helps preserve the velvety filling and crispy base
Ingredient Swaps That Work
No Butterfingers on hand Try chopped toffee bars or peanut butter cups for a different twist Use chocolate sandwich cookies from another brand as long as you remove the filling Low fat cream cheese works but the final cheesecake will be less rich and creamy You can use Greek yogurt in place of sour cream for a slightly lighter flavor
Creative Ways to Serve
For extra flair top each slice with a drizzle of warm chocolate sauce and more chopped candy For a birthday offering stick candles into the whipped cream border and surround the edges with extra candy pieces I even love to serve smaller squares as part of a dessert bar at parties
A Sweet Modern Classic
Butterfinger candies have roots tracing back to the twenties Since then they have become an American favorite combining crispy peanut butter with a chocolatey casing The way they melt and stay crunchy is exactly what makes this cheesecake so charming It is nostalgic and new all at once
Seasonal and Personal Touches
Infuse the batter with a pinch of cinnamon or nutmeg in fall Swap half the sour cream for pumpkin puree for an autumn version Try white chocolate chips for a different ganache topping
A few helpful notes
Room temperature dairy pairs together more easily and prevents lumps Always use a water bath for your cheesecake to guarantee a creamy texture Let the cheesecake rest before decorating for perfect clean cuts
Success Stories
This was the first cheesecake I made for my best friend during college finals She declared it better than a campus café treat and has requested it every year since My aunt now asks for it by name every Christmas
A Freezer Friendly Option
If you want to prep this dessert ahead of time assemble and bake the cheesecake according to directions Cool completely then wrap in plastic and foil before freezing Thaw overnight in the refrigerator before adding ganache and whipped cream topping
Butterfinger cheesecake is a sure fire way to wow at your next special occasion With every slice you are serving nostalgia, crunch, and pure joy
Common Recipe Questions
- → How do I prevent the cheesecake from cracking?
Use a water bath, mix batter on low speed, and allow the cheesecake to cool gradually in the oven with the door cracked open.
- → Can I use a different type of crust?
Yes, graham cracker crumbs work well if you’d like a lighter alternative to Oreo crusts.
- → Is it necessary to use fun-sized Butterfingers?
No, you can use any Butterfinger size—just chop to small pieces for even distribution in the filling and topping.
- → How long should I chill before serving?
Refrigerate until firm for at least 5-6 hours, or overnight for best texture and flavor.
- → What kind of peanut butter is recommended?
Creamy, no-stir peanut butter yields the smoothest finish without affecting consistency.
- → Can I freeze leftovers?
Yes, wrap tightly and freeze for up to 1 month. Thaw in the refrigerator before serving.