
 Save
Save
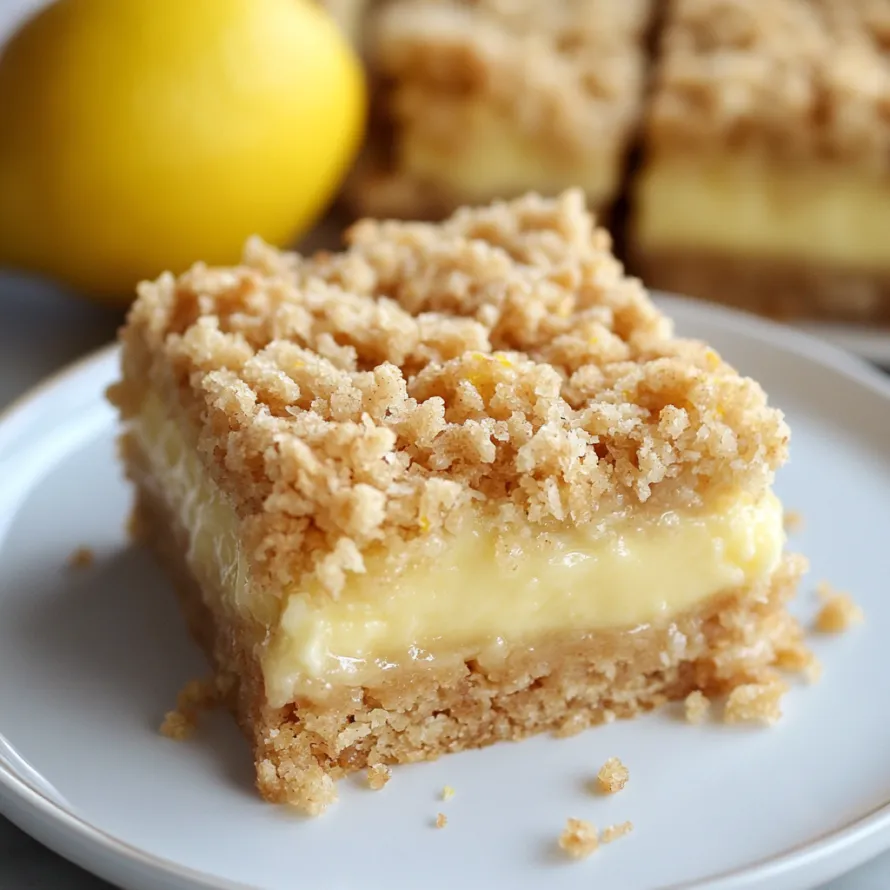
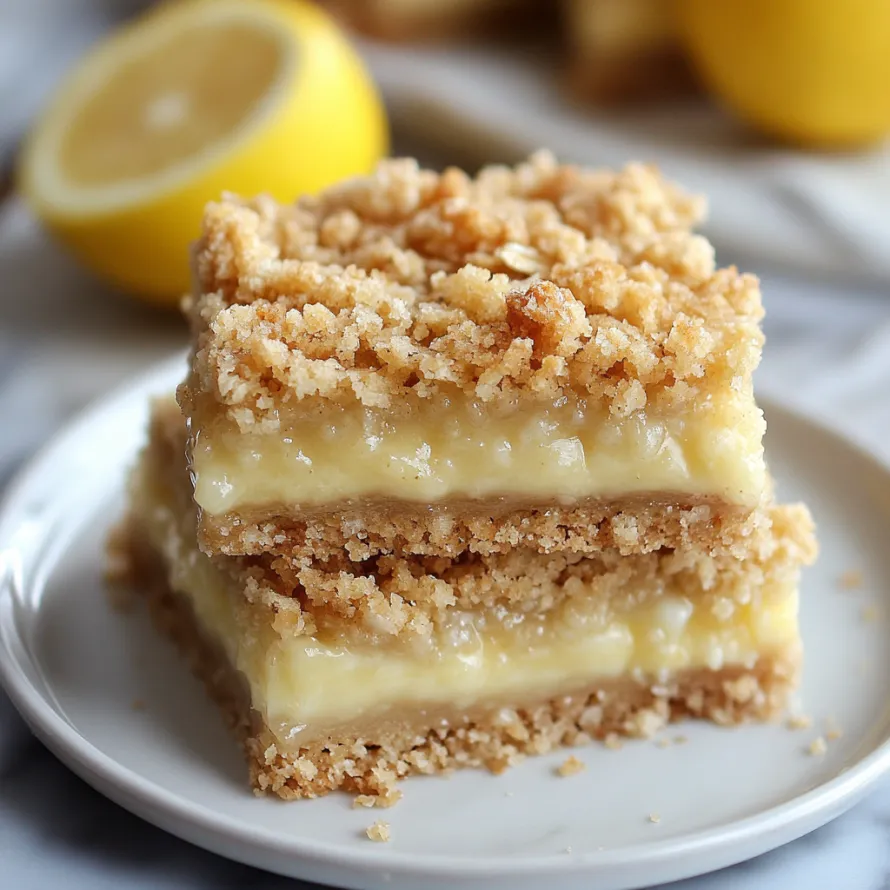
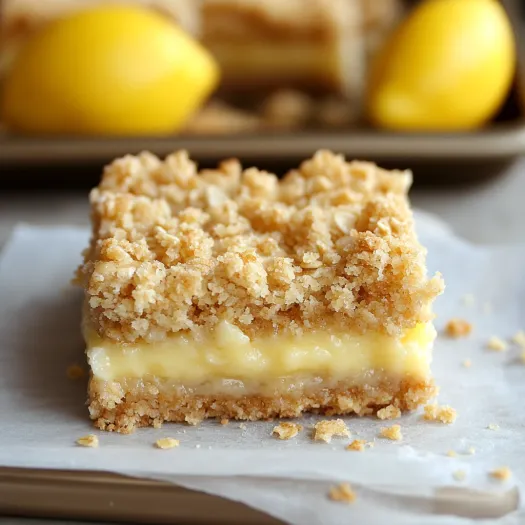
These delightful lemon crumb squares blend buttery, crumbly goodness with zingy citrus filling. You'll love how the two textures work together to create a treat that's both cozy and refreshing—perfect for anything from casual coffee dates to outdoor summer events.
I came up with these squares when I needed something easy to carry to a block party. They were such a massive hit that I went home with three requests for the instructions, and now everyone expects me to bring them to every warm-weather get-together.
What You'll Need
- All purpose flour: Creates the base of our crumble, making it tender and sturdy
- Old fashioned rolled oats: Brings nice bite and slightly toasty flavor
- Salt: Makes all the other flavors pop and cuts the sweetness
- Baking soda: Gives just enough puff to keep the crumble light
- Granulated sugar: Adds pure sweetness that works well with the tart lemon
- Light brown sugar: Brings warm, molasses notes to the crumbly layers
- Unsalted butter: Grab the good stuff since its flavor really stands out here
- Vanilla extract: Adds cozy flavor notes to the buttery mixture
- Sweetened condensed milk: Makes the filling ultra creamy and sweet
- Lemon zest: Try to find organic lemons for the strongest flavor punch
- Fresh lemon juice: Skip the bottled stuff—it won't taste nearly as good
- Egg yolks: Brings richness and helps the filling firm up nicely
How To Make It
- Get Your Pan Ready:
- Turn your oven to 350°F and grease an 8x8 inch pan really well. Don't forget the corners where things like to stick. If you want, you can line it with parchment paper that hangs over the sides to make lifting easier.
- Combine Dry Stuff:
- Grab a big bowl and mix the flour, oats, salt, and baking soda together. Stir well so the baking soda gets evenly spread throughout the mixture.
- Put In The Sugars:
- Dump both sugars into your flour mixture. If the brown sugar has lumps, just squish them with your fingers to break them up so everything mixes evenly.
- Add The Wet Stuff:
- Pour in melted butter and vanilla. The butter should be warm but not super hot. Mix with a spoon until everything looks damp and clumps together when you squeeze it.
- Make The Bottom Layer:
- Take exactly half your crumbly mix and push it firmly into the bottom of the pan. Make it nice and even. Use the bottom of a measuring cup to press it down tight so it won't fall apart later.
- Bake The Bottom First:
- Stick the pan in the oven for 15 minutes until it starts to set up and gets a bit golden around the edges. This step keeps the bottom from getting soggy once you add the filling.
- Mix Up The Lemon Stuff:
- While that's baking, stir together the condensed milk, lemon zest, lemon juice, and egg yolks in a bowl. You'll notice it gets a bit thicker as you mix because the lemon juice reacts with the milk and eggs.
- Put It All Together:
- Once the crust is done with its first bake, take it out and pour the lemon mixture over it, spreading it out evenly. Then sprinkle the rest of your crumble on top, letting some lemon filling peek through.
- Finish Baking:
- Put it back in the oven for 20-22 minutes until the top gets slightly golden and the filling looks mostly set but still wiggles a tiny bit in the middle. It'll firm up more as it cools.
- Let It Set:
- Let everything cool down completely, then put it in the fridge for at least 2 hours or overnight. This waiting time is super important—it lets the filling set properly and the flavors get even better.
My real trick isn't about fancy ingredients but how I put it together. I found out the hard way that pre-baking the bottom crust stops it from getting mushy. My first try tasted amazing but fell apart in everyone's hands. Now they're sturdy enough to pick up and eat without needing forks.
Picking The Best Lemons
When you're shopping for lemons, look for ones that feel heavy—they'll have more juice inside. Meyer lemons work great when you can find them, with their slightly sweeter, more fragrant flavor. But regular Eureka or Lisbon lemons are fantastic too, giving that bright, tangy kick that works so well with the sweet condensed milk. Always grab the zest before you squeeze them, and try warming them up and rolling them on the counter before juicing to get every last drop out.
Making Ahead And Keeping Fresh
These lemon bars taste even better the next day. You can keep them in a sealed container in the fridge for up to 5 days, and they'll just keep getting tastier. Want to save them longer? These freeze really well too. Just cut them into pieces first, wrap each one in plastic, and pop them in a freezer container. They'll stay good for up to 3 months. Let them thaw in the fridge overnight or sit out for about an hour before serving.
Ways To Switch It Up
You can easily change this recipe to suit your taste. Try mixing in 1/4 cup of toasted coconut with the crumble for a beachy twist. Or swap some of the lemon juice with lime or orange juice for a different citrus kick. White chocolate chips sprinkled in the topping melt slightly while baking, creating little pockets of sweetness. In berry season, toss in 1/2 cup of fresh blueberries with the filling—they look pretty and taste amazing with the lemon.
From backyard cookouts to fancy dinner parties, these zesty lemon squares bring a burst of sunshine to any table.
Common Recipe Questions
- → How long should these bars chill before slicing?
Let them chill for about 2-3 hours or leave them overnight. If you want cleaner cuts, freeze them briefly beforehand to keep the filling firm.
- → Is fresh lemon juice a must or will bottled work?
Fresh juice gives the brightest flavor, but bottled can work. Be sure it’s pure lemon juice—no sweeteners or additives—for the best results.
- → How do I store leftover bars?
Use an airtight container and keep them in the fridge for up to 5 days. The cool temperatures help the filling hold its texture and stay firm.
- → Can I double this for a larger batch?
Absolutely! Use a 9x13-inch pan. You may need to bake for an extra 5-8 minutes but keep an eye on the top to avoid over-browning.
- → Why are egg yolks part of the filling?
The yolks thicken the filling and give it that creamy, custard-like consistency. They also ensure everything sets properly when it cools down.
- → Is this recipe adaptable to be gluten-free?
Yes! Swap the all-purpose flour for a gluten-free blend and use certified gluten-free oats. The texture will change a bit, but they'll still be fantastic.