
 Save
Save
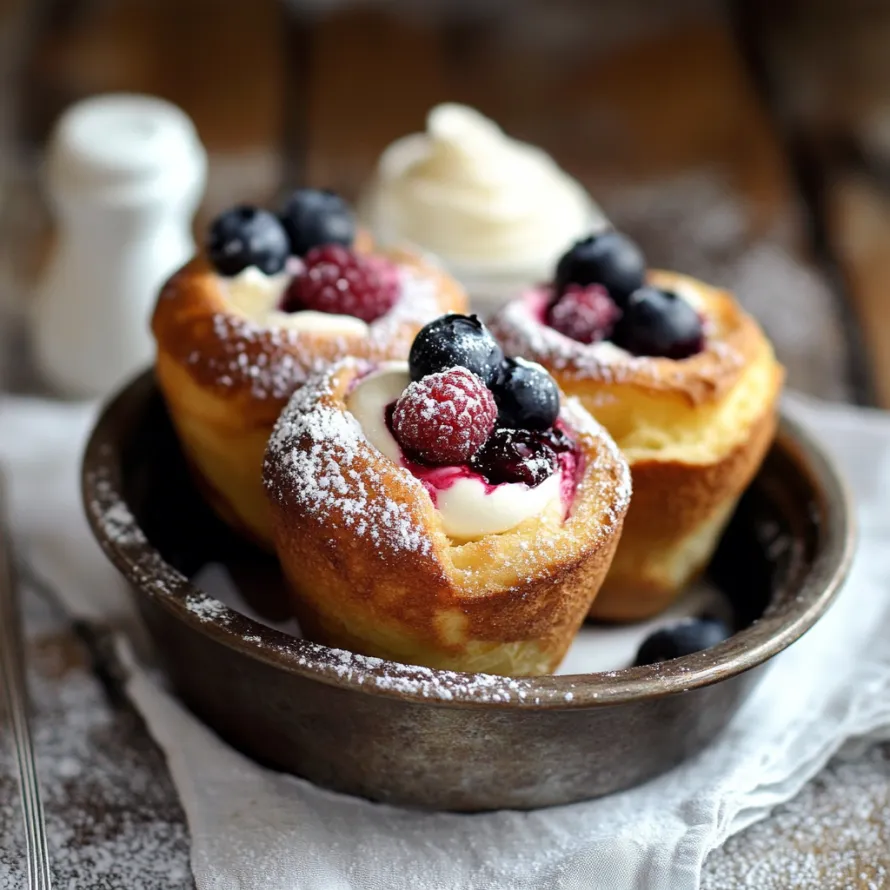
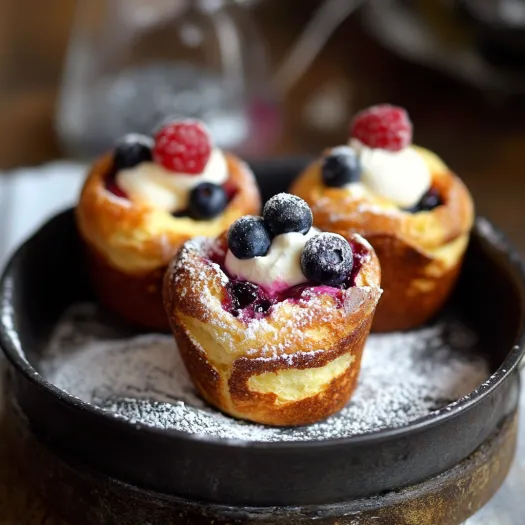
These puffy blueberry and raspberry treats balloon spectacularly in the oven, turning basic ingredients into show-stopping pastries. Their light, fluffy centers and crispy outsides make the perfect home for sweet berries that pop with taste while baking.
I first came across popovers at my grandma's Sunday morning table. Her trick was resting the mix all night, which helped them grow taller. These days I whip up these berry-packed versions whenever I want to make breakfast feel extra special without spending forever cooking.
Ingredients
- Plain flour: 200 grams. Forms the base of your treats. Don't skip sifting if you want a silky mix that rises well.
- Salt: 1/4 tsp. Lifts all the tastes and cuts through sweetness.
- Whole milk: 250 milliliters. Make sure it's not cold for proper puffing. The fat helps make everything richer.
- Large eggs: 4. Warm eggs mix in better. They give strength and help everything rise.
- Blueberries: 30. Pick firm ones that aren't too soft to keep extra water out of your pastries.
- Raspberries: 12. New raspberries bring tanginess and pretty red spots.
- Maple syrup: 30 grams. Gives a deeper sweetness than plain sugar would.
- Unsalted butter: 60 grams. Chilled butter makes steam for dramatic puffing. Better butter means better flavor.
- Double cream: To serve. A fancy topping that melts wonderfully on warm pastries.
- Icing sugar: As needed. This final touch makes them look fancy and adds sweetness.
Step-by-Step Instructions
- Prepare the batter:
- Sift your flour and salt together in a big bowl to get rid of bumps. Mix in eggs, milk, and maple syrup, then beat hard until it gets bubbly and smooth all through. Cover it with plastic wrap and stick it in the fridge for 30 minutes or leave it overnight if you can, so the mix can rest properly.
- Preheat and prepare pans:
- Turn your oven up to 220°C/200°C fan. Drop about 5 grams of cold butter in each spot of your popover pan or muffin tray. Once the oven's hot enough, put the pan in for 2 minutes until butter melts and starts to sizzle.
- Fill the pans:
- Put your rested mix into a pitcher so it's easy to pour. Carefully grab the hot pan from the oven and quickly pour mix into each cup about three-quarters full. Work fast to keep the pan hot but don't rush your measuring or they won't bake evenly.
- Add berries:
- Softly drop blueberries and raspberries on top of each batter cup. They'll sink a bit as everything cooks and grows. Try to share them fairly between all cups.
- Initial baking:
- Slide the filled pan into the hot oven and bake at 220°C/200°C fan for 15 minutes without peeking. This first blast of heat makes steam that helps everything puff up big.
- Reduce heat and finish baking:
- Turn the oven down to 200°C/180°C fan and keep baking another 15-20 minutes until they've grown tall and turned a nice golden color.
- Serve immediately:
- Take them out and gently lift each one from the pan. Sprinkle lots of icing sugar on top and serve with whipped cream or ice cream while they're still warm for the best look and taste.
My best memory with these popovers was when my little niece helped me cook them last summer. She couldn't believe her eyes as she watched them grow bigger through the oven door. There's something wonderful about how they rise that amazes kids and grown-ups too.
The Secret to Perfect Rising
What makes popovers grow so tall is all about temperature differences. Your mix should be cold from the fridge while your pan needs to be super hot. This big temperature gap creates steam that makes them shoot upward. Don't ever open the oven in the first 20 minutes or they'll fall flat. The butter in the cups should be hot enough to sizzle when mix touches it but not so hot it burns before everything sets up.
Make Ahead Options
Though they're best right away, you can mix everything up to 24 hours early. Just give it a quick stir before using. If you need to make them ahead, warm already baked ones in a 150°C oven for about 5 minutes before serving. They'll get some crunch back but won't be as amazing as fresh ones. For busy weeks, you can freeze baked popovers up to a month and heat them from frozen at 180°C for 7-8 minutes.
Seasonal Variations
This dish shows how flexible popovers can be with different fruits. In fall, try chunks of apple with cinnamon sugar. Winter works great with orange zest and cranberries for a holiday feel. Spring calls for strawberries and lemon zest, while summer lets you use any berries you want. For a savory twist, skip the maple syrup and berries and throw in herbs, cheese, and even bits of ham or bacon. The basic mix works well with almost any flavors you like.
Popovers hit that sweet spot between easy and fancy, making them a go-to favorite no matter what you're celebrating.
Common Recipe Questions
- → Why is letting the batter rest important?
Giving the batter about 30 minutes to rest lets the flour soak up moisture and relaxes the gluten, making the final popovers light and airy with a good rise and hollow center.
- → Can I swap fresh berries for frozen ones?
Totally! Frozen berries will work, but they'll release extra moisture. Keep them frozen until use, toss them in a little flour, or use a bit fewer to keep the texture just right.
- → Why heat up the pan with butter first?
Hot butter in the pan sizzles when the batter hits, helping the popovers puff up immediately. It also prevents sticking and adds flavor to the crispy outside.
- → Can I prepare the batter hours in advance?
Yep! You can mix it the night before and keep it in the fridge. It makes prep easier and improves the batter as the gluten softens and the texture sets up better.
- → What causes popovers to collapse sometimes?
They might collapse if you take them out too soon, open the oven door while baking, or if the oven isn't hot enough. Keeping to the high-and-low baking method helps keep their structure intact.
- → Can I try other berry options?
Sure thing! Swap in blackberries or small strawberry pieces. Just watch out for their moisture levels and adjust the maple syrup for sweetness if needed.