
 Save
Save
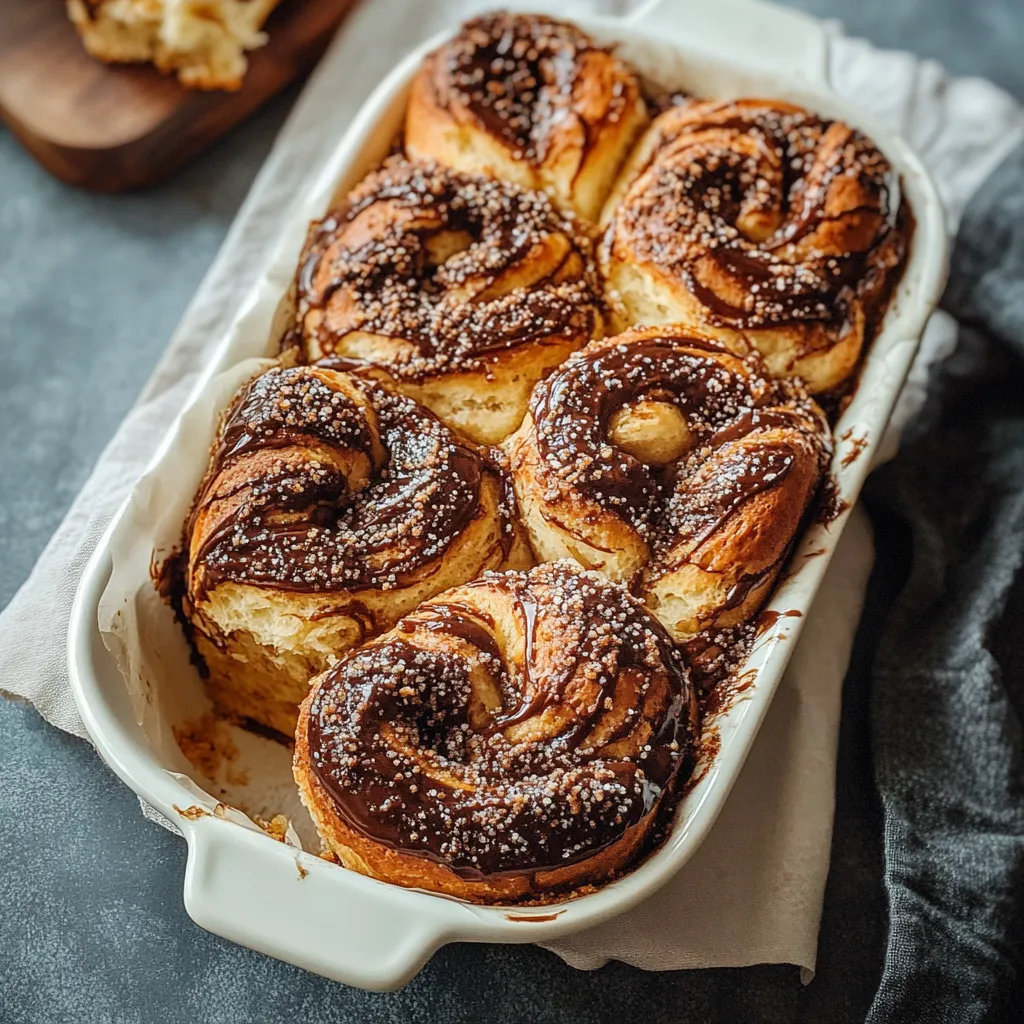
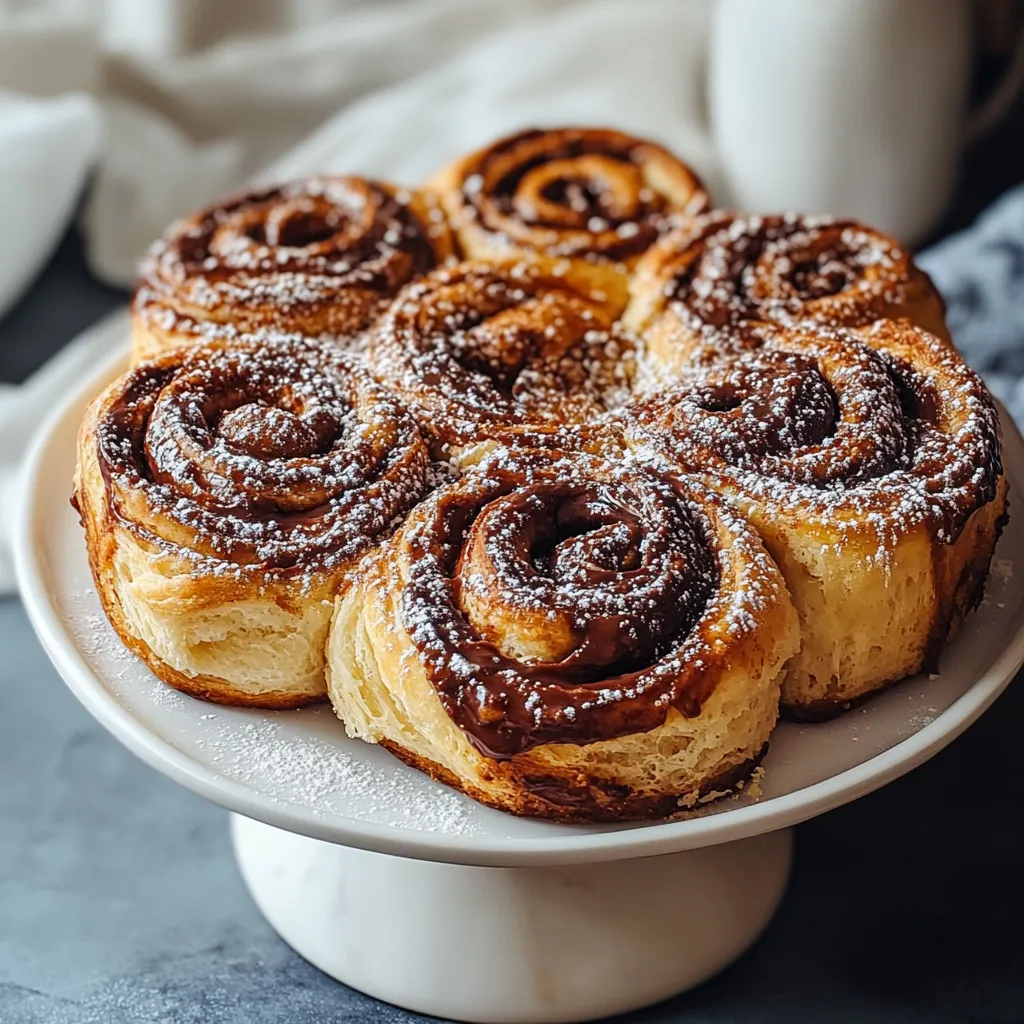
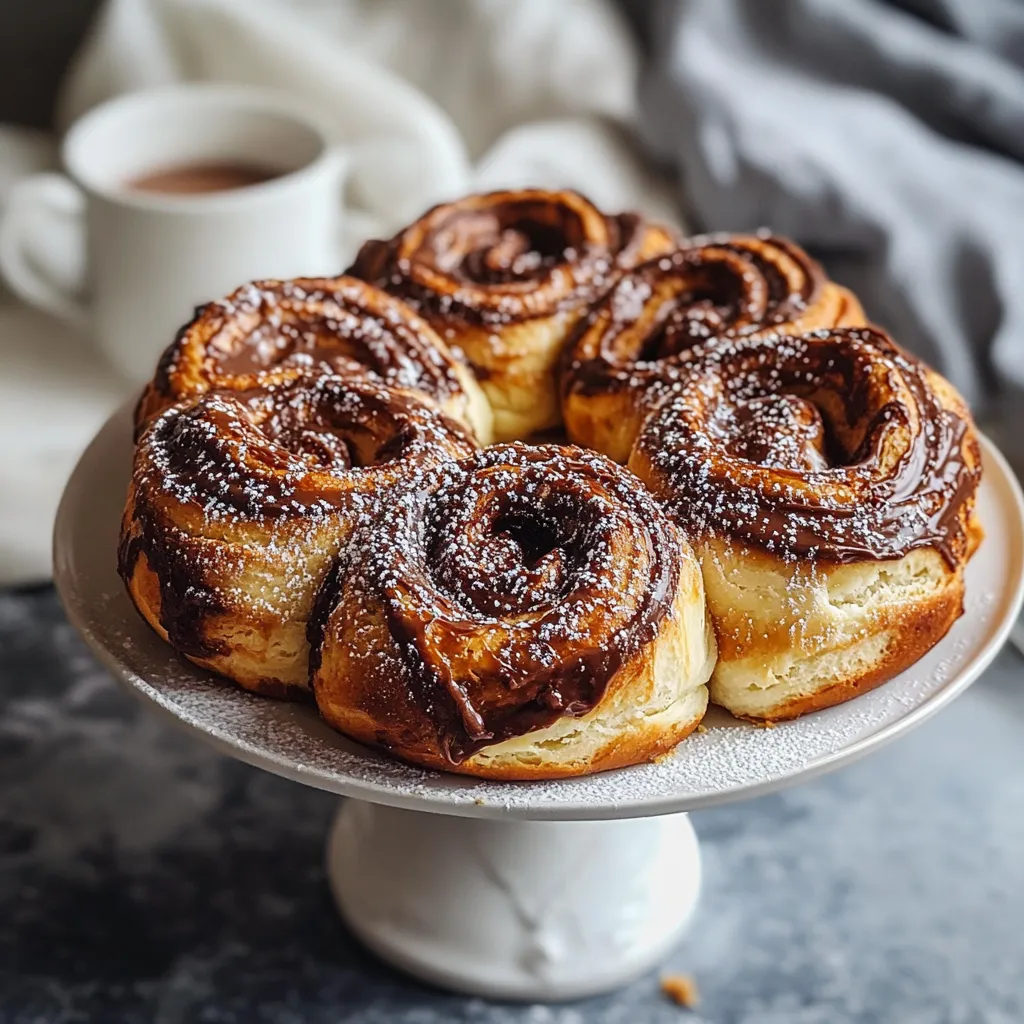
With these Nutella babka buns, you'll get soft, buttery dough wrapped around gooey, chocolaty hazelnut ribbons. Every bun is its own little treat. They're perfect for when you want something special for the weekend or to wow your friends at brunch.
These came about when I needed a showstopper for a holiday but didn’t want to stress in the kitchen all day. The smiles when everyone tried the warm buns for the first time? Totally worth it. Now, making these for family get-togethers is just what we do.
Irresistible Ingredients
- All purpose flour: Keeps these soft buns holding their shape without being tough
- Granulated sugar: Sweetens things up and gives a boost to the yeast
- Active dry yeast: Makes sure every bun has that lovely fluffy lift—use the freshest you’ve got
- Whole milk: Brings creaminess, and helps the yeast wake up if it’s just warm
- Large eggs: Pull all the parts together while adding richness
- Vanilla extract: Takes the chocolate vibes to the next level—go for pure if you can
- Salt: Rounds out the sweetness and makes your dough stronger
- Unsalted butter: Packs in rich flavor and softness, European types are extra tasty
- Nutella spread: This is your showstopper! Make sure it’s soft so you can slather it easily
- Chopped hazelnuts: Gives each bite a little crunch and deeper nutty flavor
- Powdered sugar: Makes a pretty drizzle when you glaze at the end
- Milk: Helps thin the glaze so it’s perfectly pourable
Simple Step-by-Step Instructions
- Bake to golden perfection:
- Put your buns in the hot oven for about half an hour until their tops turn golden and the middle hits 190°F. They’ll grow and stick together for those soft sides. Spin your pan if your oven bakes unevenly so everything cooks just right.
- Second rise:
- Lay the slices in a greased big pan, swirl-side up, leaving a little elbow room. Cover and let them puff up for 30 minutes. While you wait, get your oven hot—350°F does the trick.
- Create the spirals:
- Roll up your dough into a log, starting along the long side, and pinch the edge so it stays together. For neat swirls, cut with plain dental floss or a sharp knife into 12 equal pieces—floss keeps the spirals nice and clean.
- Shape the buns:
- Roll the dough out in a big rectangle on a floured spot, aiming for even thickness. Spread out your Nutella (make sure it’s not cold!) with a spatula, staying about an inch from the sides. If you want hazelnuts, sprinkle them over the chocolate now.
- First rise:
- Move the dough ball to a lightly greased bowl, cover with a damp towel or plastic wrap, and let it rise somewhere warm. In about an hour or so, it should double and spring back when touched. This slow rise builds loads of flavor.
- Get the dough ready:
- In a big bowl, mix together the flour, sugar, and yeast. Make a well and add warm milk, eggs, vanilla, and salt. Start stirring everything up with a sturdy spoon. Mix in the room temp butter a bit at a time until it all blends together. Knead the dough well for 10 minutes—don’t rush. It’ll change from sticky to soft as you keep working it.
Nutella is what makes this shine. After I used way too much the first try and it oozed everywhere, I learned to keep things thin and even. Now my kids roll the dough and try not to sneak too many bites of filling!
Overnight Game Plan
If you want fresh, warm buns in the morning, prep them through slicing and put them in the baking dish. Seal up tight and keep in the fridge overnight. The next day, bring them out and chill at room temp for half an hour before baking. This little rest actually bumps up the flavor and makes baking a breeze when you’re sleepy.
Fun Mix-In Ideas
Switch up the filling if you want! Toss in cinnamon sugar and apple bits for a cozy fall bun. Swap Nutella for cookie butter if you love spice. Or do a fruity twist—spread some cream cheese and your favorite jam before rolling up the dough. No matter what you pick, those swirly layers look awesome every time.
How to Serve
The buns are showstoppers for weekend brunch—just add some fresh fruit and a hot cup of coffee. Or go all out for dessert: pop a bun in the microwave to warm, then add ice cream. Around the holidays, toss them on a tiered tray with other treats and it’ll be the first thing people grab.
Your kitchen will smell out of this world after baking these Nutella babka buns. Eat them warm—they really are next-level when they’re fresh.
Common Recipe Questions
- → Can I prepare these Nutella babka buns ahead of time?
Definitely! Just make the dough and shape the buns. Leave them in the fridge overnight for their last rise. When you're ready to bake, pull them out about half an hour to warm up before you pop them in the oven.
- → What can I substitute for hazelnuts?
Almonds, pecans, or walnuts are all great swaps. You could even skip the nuts or throw in chocolate chips for extra chocolate goodness.
- → How should I store leftover babka buns?
Once the buns are totally cool, keep them in an airtight container on the counter for two days. If you want them to last, pop them in the fridge for up to five days—or freeze up to three months. Warm them up before eating for best results.
- → Can I use homemade chocolate spread instead of Nutella?
For sure! Any chocolate-hazelnut spread works. Just make sure it's easy to spread, like Nutella.
- → Why did my dough not rise properly?
Yeast likes things warm—not hot! If your milk was way too hot or too cold, or your yeast was old, that might stop the rise. Keep the dough somewhere cozy without drafts and check your yeast's freshness for next time.
- → Can I make these without a stand mixer?
Yep, you can knead by hand. It just takes a bit more energy—especially when you add the butter—but you'll still get awesome buns.